Key Takeaways
- The Kindle Scribe is the only Kindle that can be used as a digital notebook for sketches and notes.
- The toolbar on the Scribe offers various tools for customizing digital ink, including different pen styles and an eraser.
- The Premium Pen for the Scribe has a built-in eraser and a shortcut button that can be customized in the device’s settings.
Amazon’s Kindle Scribe is not only the biggest Kindle the company sells, but it’s also the only Kindle that you can use as a digital notebook for sketches and taking notes. Included with every Kindle Scribe is a Basic Pen, or you can pay a little bit more for the Premium Pen that brings with it extra features to enhance your note-taking experience.
Best note-taking apps: 7 options to jot down inspiration digitally
Capture a good idea or check off a list from your smartphone, tablet, laptop, or the web.
Regardless of which pen you end up with, you should know a few things about using it to get the most out of the Scribe. Below, I’ll walk you through all the pen’s tips and tricks, including how to use the shortcut button to do anything you want.
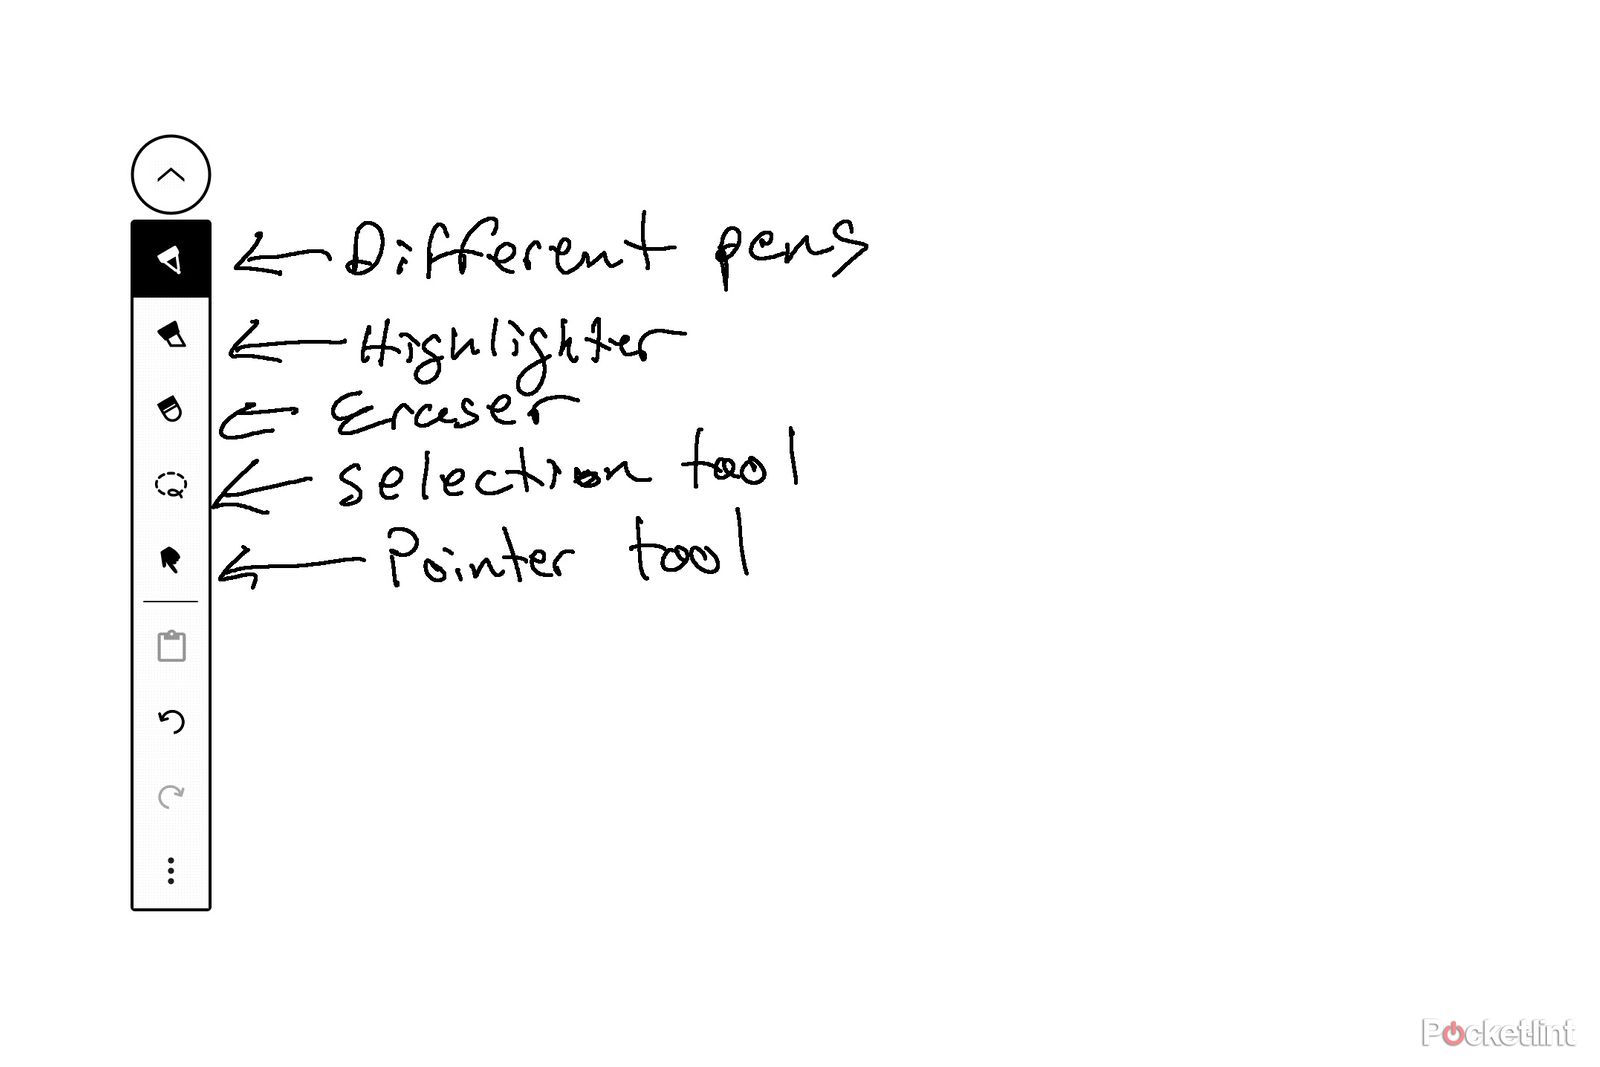
After creating a new notebook on the Scribe, you’re left staring at a blank page, ready for your next sketch, journal entry or notes from class or a meeting. The first time you put the tip of the pen to the screen, you’ll see a small line of digital pen ink streaking across it. But you don’t have to stick to using the pen, or that line thickness, if you don’t want to.
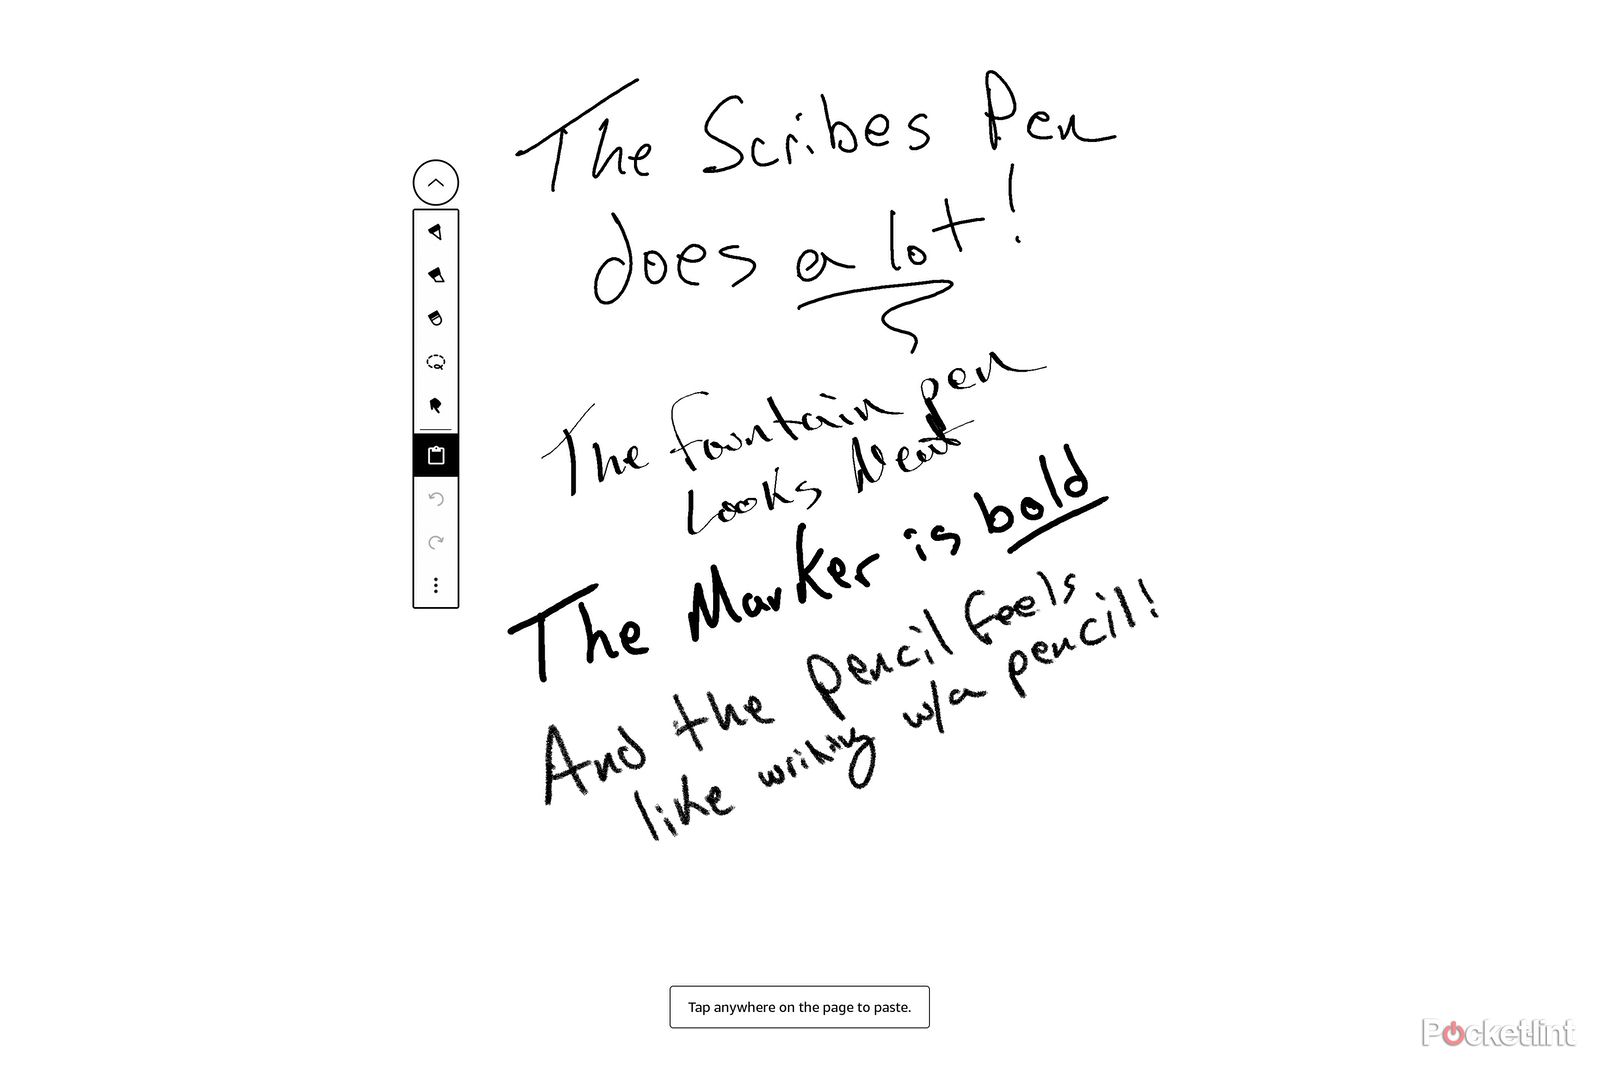
- Tap on the toolbar icon (the small circle with an arrow in it).
- The toolbar will expand, showing you several tools. The complete list, in order, is a button that displays all the available pen styles, a highlighter tool, an eraser tool, a selection tool and a pointer tool.
- Below the main writing tools, there’s also a section that includes a clipboard button for easy access to stuff you’ve copied, along with an undo and redo button, and then a menu button that gives you the option to move the toolbar to the other side of the screen.
Different Kindle Scribe pen options
You can tap on any of the tools once to select them, but if you tap on a selection, like the pen tool, a second time, you’ll see another menu that gives you all sorts of options.
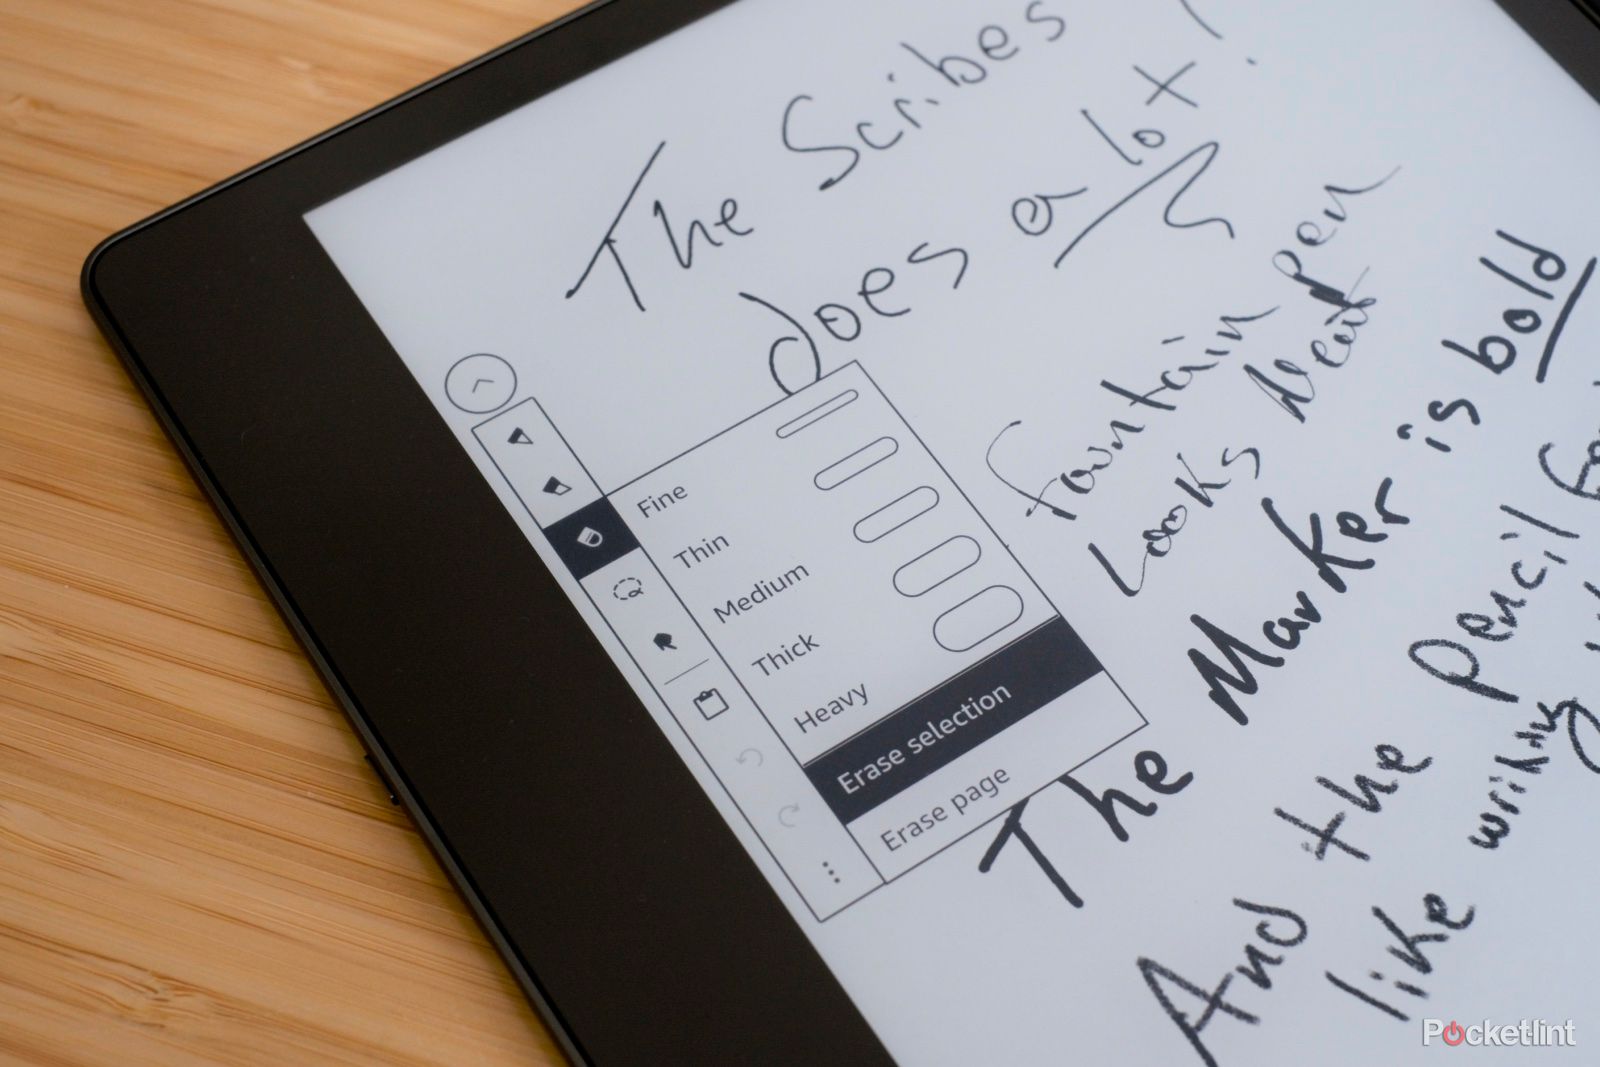
- For instance, the pen tool reveals different options for how you want the digital ink to appear as you write. There’s a standard pen, a fountain pen, a marker and a pencil. A the bottom of that list is a series of line thickness options, as well.
- The highlighter tool is handy when reviewing documents and you want to highlight a line of text or passage. If you double-tap on its icon, you can change the thickness of the highlighter.
- Selecting the eraser tool will turn the tip of the pen into an erasure, which you can use to erase wherever you move the pen, or you can set the tool to erase a selection (whatever you draw a line around), or erase the entire page.
- The selection tool, which has an icon that looks like a lasso, is used when you want to select something in your notebook and move, copy or cut it. After copying or cutting something, you can paste it just by tapping the page where you want it placed.
- Finally, the pointer tool lets you use the tip of the pen as a finger, allowing you to swipe between pages and navigate through a notebook with the pen.
I’ve found that the toolbar feels like it’s in the way a lot of the time when I’m using the Scribe, so what I do is tap on the toolbar button to change pens or use the undo button, and then tap on the toolbar button again to minimize it
2 Erase your mistakes on the Scribe
For those who own the Kindle Scribe and the Basic Pen, you won’t be able to flip the pen over and use the other end as an erasure like you can on a traditional pencil. Instead, you’ll need to select the eraser from the toolbar and use its various settings. However, if you have a Premium Pen, you can simply flip the pen over and use the other end to erase whatever’s on your screen. It’s a natural feeling that I’m sure most people can relate to; when you make a mistake, you flip the pen over, erase, and keep going.
One librarian’s dream gift guide: Tech for the bookworms in your life
From eReaders and headphones to label makers and smart lighting — our picks for the avid readers and audiobook fans on your list.
3 Change how the shortcut button works
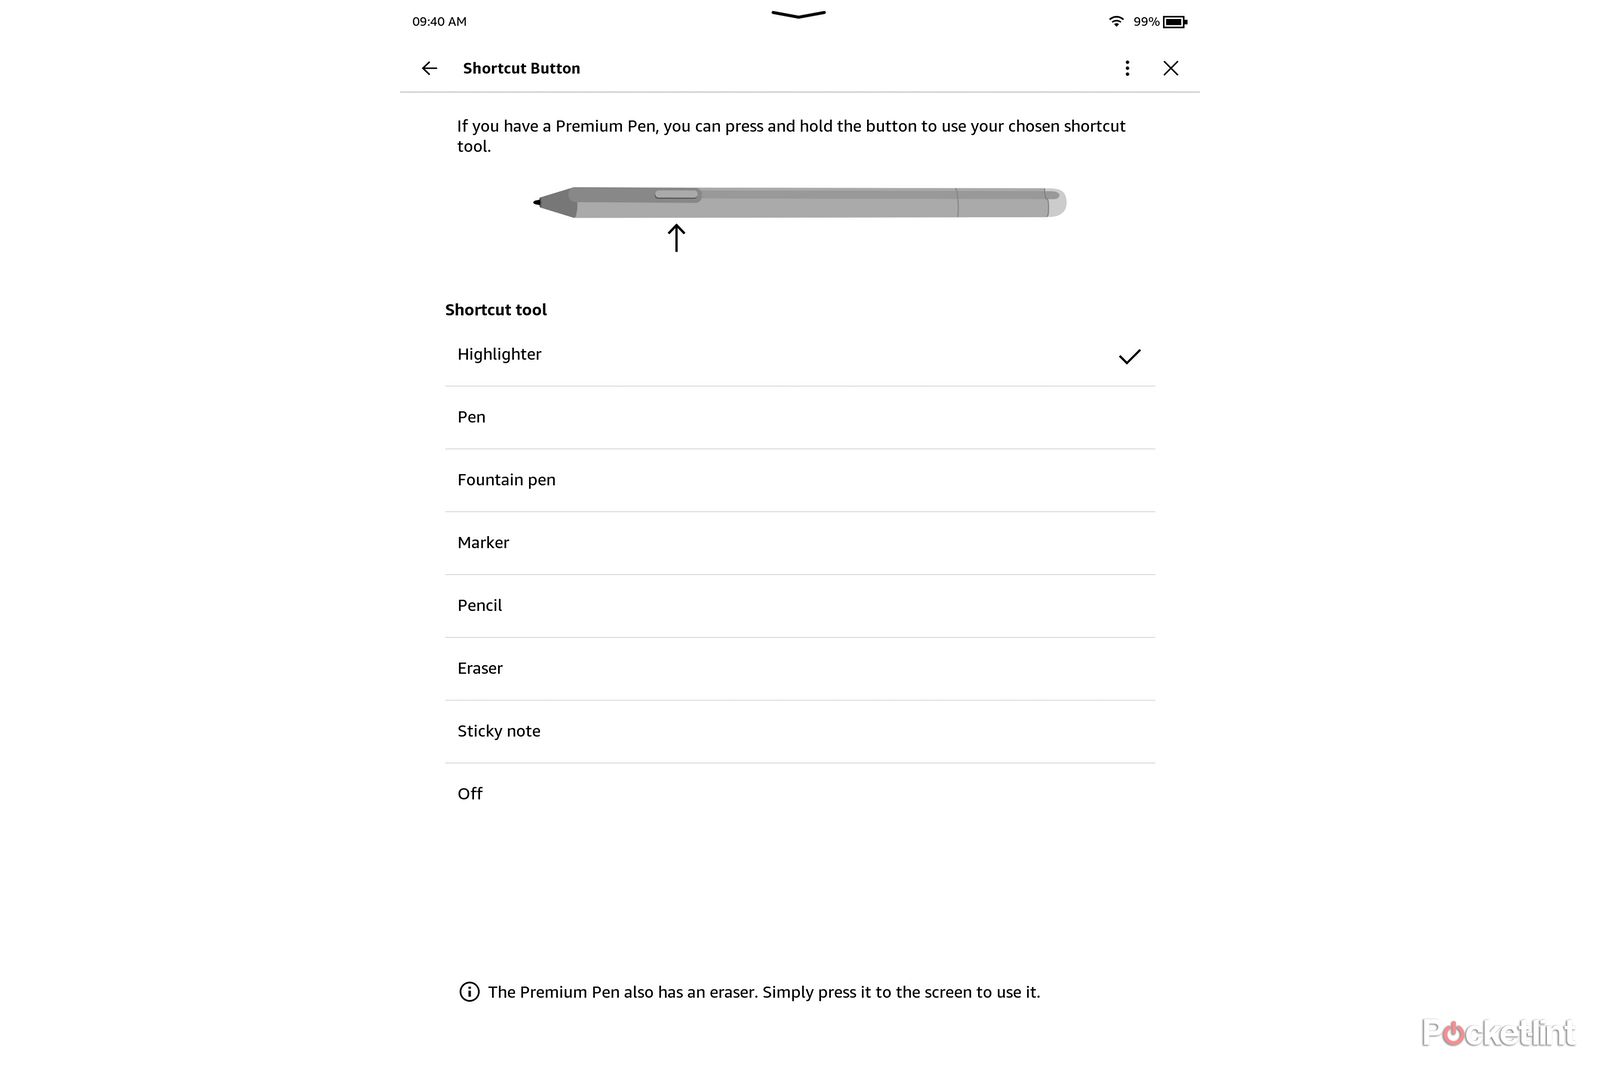
There’s a $30 difference between the Basic Pen and the Premium Pen, but for that added cost, you get extra features, such as the ability to use its built-in eraser feature. But there’s also a shortcut button on the side of the Premium Pen that gives you even more capabilities that are worth noting. To change how the shortcut button works, you’ll need to go into your Scribe’s settings.
- You can get there by tapping near the top of the screen when viewing a notebook, tapping on the three-dot icon in the top-right corner, and then selecting Settings > Pen Settings > Shortcut button.
- Once there, you’ll see a list of options to assign to the Pen’s button. The list of shortcuts and tools includes the highlighter, pen, foundation pen, marker, pencil, eraser, sticky note or leaving the shortcut button off.
- After you have a shortcut assigned to the button, to use it you just need to press and hold the button in while touching the tip of the pen to the Scribe’s screen. Doing so will instantly transition the pen from whatever setting you currently have it on, to your shortcut.
Amazon Kindle Scribe vs ReMarkable 2: What’s the difference?
Amazon launched its first e-reader/tablet crossover in 2022, but how does it compare to ReMarkable’s similar product?
If you’re looking for even more Kindle Scribe tips and tricks, make sure to checkout our roundup for more fun things to do with the revolutionaty eReader.
Trending Products

Cooler Master MasterBox Q300L Micro-ATX Tower with Magnetic Design Dust Filter, Transparent Acrylic Side Panel…

ASUS TUF Gaming GT301 ZAKU II Edition ATX mid-Tower Compact case with Tempered Glass Side Panel, Honeycomb Front Panel…

ASUS TUF Gaming GT501 Mid-Tower Computer Case for up to EATX Motherboards with USB 3.0 Front Panel Cases GT501/GRY/WITH…

be quiet! Pure Base 500DX Black, Mid Tower ATX case, ARGB, 3 pre-installed Pure Wings 2, BGW37, tempered glass window

ASUS ROG Strix Helios GX601 White Edition RGB Mid-Tower Computer Case for ATX/EATX Motherboards with tempered glass…


